- MENU
- HOME
- SEARCH
- WORLD
- MAIN
- AFRICA
- ASIA
- BALKANS
- EUROPE
- LATIN AMERICA
- MIDDLE EAST
- United Kingdom
- United States
- Argentina
- Australia
- Austria
- Benelux
- Brazil
- Canada
- China
- France
- Germany
- Greece
- Hungary
- India
- Indonesia
- Ireland
- Israel
- Italy
- Japan
- Korea
- Mexico
- New Zealand
- Pakistan
- Philippines
- Poland
- Russia
- South Africa
- Spain
- Taiwan
- Turkey
- USA
- BUSINESS
- WEALTH
- STOCKS
- TECH
- HEALTH
- LIFESTYLE
- ENTERTAINMENT
- SPORTS
- RSS
- iHaveNet.com: Home & Garden
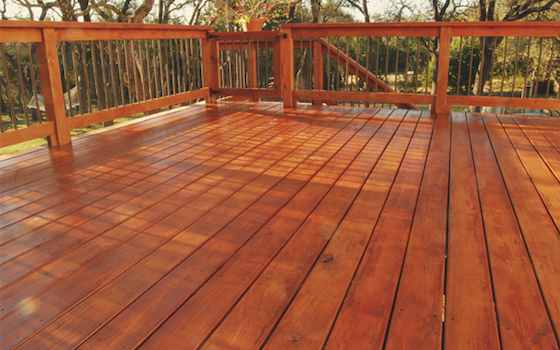
All Hands on Deck: How to Build a Deck
by Ron Marr
Here's how to build a deck for summertime fun. Doing it yourself isn't as tough as you think
While it's not as easy as building a birdhouse, the thought of building your own deck need not lead to a panic attack.
A simple, free-standing square deck for the backyard -- a place to grill and chill -- can be completed over a weekend.
A deck that's not attached to a house doesn't require deep footings, a warehouse of tools or any sort of spatial wizardry. All you need are building materials, hardware and basic tools found in most any home workshop. A flat piece of ground doesn't hurt either, unless you enjoy moving and leveling mountains of dirt.
This particular model is based on the idea of constructing the deck first and, with the help of friends who may be paid in burgers and beer, moving it to its permanent foundation.
1. Frame It
Purchase four pieces of straight, pressure-treated, 2-by-6-by-12 lumber. A 12-by-12 deck is just large enough to offer comfort, though you can build to any dimension you wish. Measure all four pieces to make certain they are exactly the same length.
2. Nail It
Sit two boards perpendicular to each other on their 2-inch sides. Connect with 2-inch nails or wood screws. Repeat this process until you have a 12-by-12 square.
3. Measure Twice
Measure diagonally from corner to corner. If your lumber was correctly sized, the measurement will be exactly the same and your frame will be square. If the measurement is off, you can throw a fit, or adjust the framing by adding spacers. Or both.
4. Bring in Reinforcements
Screw reinforcing angle brackets into all four corners of the now-square frame. The brackets add considerable strength. Choose the galvanized versions (this goes for nails and screws as well) as they don't rust. They cost a bit more, but it's more than worth it.
5. Opposing Joists
Nail joist hangers onto the inside edges of two opposing sides of the frame. The hangers must be directly aligned with each other lengthwise, and should be no more than a foot apart. Variations aren't acceptable, unless you want a deck with big gaps in it.
6. Hangers Meet Joists
Whip out your tape measure and determine the distance between the joist hangers (they will be 11 feet and change). Cut 2-by-6 joists to fit, slide them into the hangers, and secure with nails.
7. You Can Dig It
Pay a visit to the site where your deck will rest. Bring along a shovel, plenty of gravel, and at least 12 concrete blocks. Place a wooden stake in the ground at each corner of your 12-by-12 square.
Dig a square hole every 3 feet around the perimeter of the square, and layer with gravel. Place the concrete blocks atop the gravel. All 12 blocks must be level with one another. Add or remove gravel as needed until they are.
8. Strength in Friends
Contact your large friends and enlist them to move your deck frame to the concrete blocks/supports. You'll need to jockey the frame around a bit to make sure it is centered. The weight of the deck and strength of your friends will dictate how many people you'll need -- you're on your own on this one. Safety first!
Once centered, attach the frame to the concrete blocks with 90-degree angle brackets.
9. Hit the Floor
Cut 1-by-6 lengths of lumber for your deck flooring, and lay them perpendicular to the joists. The easiest way to keep them straight is to install the two outermost pieces and install inward. Screwing the flooring to the joists with wood screws is one option, although a pocket-joinery tool designed for decks (with screws of the appropriate length) makes for a much more attractive deck. It all depends on your skill level.
Rather than cutting each piece of flooring to an exact length, and attempting to line it up perfectly with the edges, it's best to cut them a few inches long. Go ahead with your installation, and then slice the protruding ends square with a circular saw.
10. Accessorize
At this point your deck is functionally complete. Let the lounging and grilling commence. You might also consider adding skirting boards over the pressure treated lumber, staining/painting the flooring or building planters or rails. All optional.
Ron Marr is a long-time woodworker and luthier whose work can be seen at marrsguitars.com. He is also a frequent contributor to The Workbench Life
AUTOS | HOBBIES | EDUCATION | FAMILY | FASHION | FOOD & RECIPES | HOME DECOR | RELATIONSHIPS | PARENTING | PETS | TRAVEL | WOMEN
Article: Copyright ©,
Home & Garden: "All Hands on Deck: How to Build a Deck"